 |
Frequently Asked Questions and User Guide
|
|
Frequently Asked Questions and User Guide
|
Welcome to the installation chapter of the user guide. BALTRAD software has been built and installed in several countries. If it works for us, it can work for you.
The golden rule when it comes to installation in BALTRAD is that instructions should always be provided in a text file called INSTALL. This is the ultimate installation reference, and it takes precidence over fancier documentation like this. It's also likelier that the INSTALL file will be updated quicker than this page. However, we will do our best to present the same information here in a more attractive way that gives a little more context than the terseness of the reference.
In the following, we assume that you are interested in installing a BALTRAD node, which is a complete system comprising the collection of various subsystems. If you want to install any of these individual subsystems alone, please consult that package's INSTALL file.
As of release 3.1 we have added automatic building of RPMs that can be used on both RedHat 8 and CentOS Stream 8 and above which is the recommended way to install the software, please refer to Installing pre-built rpms (CentOS Stream 8). We realise that some users are not able to use RedHat or CentOS Stream 8 and in those cases we also provide the old legacy node installer.
This means that there are two different ways to install the software and it's up to the user to decide what is the preferred way.
In both situations, it's essential that you have installed a 64-bit Linux and if using the node installer that the requirements in \req req_sw is installed.
We use a Postgre SQL server. It doesn't have to be physically located on the same machine that you're using to install your BALTRAD node. Start by checking how secure your Postgre server is. Optionally you can raise its security level a bit by editing the /var/lib/pgsql/data/pg_hba.conf file. Towards the bottom, the entries should appear as here:
# TYPE  DATABASE    USER        CIDR-ADDRESS          METHOD

# "local" is for Unix domain socket connections only
local   all         all                               md5
# IPv4 local connections:
host    all         all         127.0.0.1/32          md5
# IPv6 local connections:
host    all         all         ::1/128               md5
If you did this, then you have to restart the server:
root# service postgresql restart
This was an optional step. Next, we create the database and database user for the node. As user postgres:
# su - postgres
$ psql
psql (version)
Type "help" for help.
postgres=# CREATE USER baltrad with PASSWORD 'baltrad';
postgres=# CREATE DATABASE baltrad with OWNER baltrad;
You can choose other names for your database and user, and you should probably use another password, but please keep track of them; for the purposes of this documentation, we'll continue using these ones. If your database is on another machine, then keep track of that machine's IP number!
All pre-built rpms can be found here: http://rpm.baltrad.eu/CentOS/8/latest/ and you can also find the yum repository file here.
The recommended way to install the baltrad node is to setup the server to use the baltrad node yum repository. To do that you will have to login as root and do a number of steps. After that the installation and updates will hopefully be quite painless.
First, you will have to fetch the repo-file to setup the Baltrad-repository and update the repositories
%> cd /etc/yum.repos.d
%> wget http://rpm.baltrad.eu/CentOS/8/latest/baltrad-package-latest.repo
%> dnf update
Next is to install the dependencies. Most of them should be handled automatically by the rpms but there are some things that will not work out of the box. You will need to install the epel-release as well as enabling powertools.
%> dnf -y install https://dl.fedoraproject.org/pub/epel/epel-release-latest-8.noarch.rpm
%> dnf config-manager --set-enabled powertools
Now, it is time to install the baltrad software. There are 3 main packages. Rave, baltrad-db and baltrad-node-*. These will install servers and product generators. Then there are plugins that will hook into the rave pgf. For example bropo, beamb and so on. Typically, the following command should install everything.
%> dnf install rave* baltrad* bropo* beamb*
After the installation of the BALTRAD rpms it is time to configure the system. The configuration is performed by using a tool "baltrad-config" which also has been installed, please refer to RPM Configuration.
Usually, if the baltrad node repo file has been added to the yum.repos.d folder, the baltrad node will automatically be notified when new updates are available. In some situations it might be necessary to first invoke
%> yum clean all
and then
%> yum update `yum list installed | grep baltrad-repo | awk '{print $1;}'`
The node installer can be used if you have decided to use a different operating system than CentOS Stream/RedHat or for some other reason want to control the installation process.
This software installation process will make heavy use of Python to fetch software and install it. The first thing that will be done is that the installer will determine if you have a Python installation that can be used for its purposes. If it can't find one, then it will bootstrap a Python for you and continue using it. As long as you specify where all the software should be installed, preferably not in a place where it will conflict with existing things, then all will be fine. The default location is /opt/baltrad.
BALTRAD uses some packages that has no active maintenance any longer which means that you might end up with some problems during the build process. The node-installer uses Python 3.6 which reachead EOL in December 2021 and is not updated any longer. This in turn might cause problems during the install process and we are looking into how this best should be handled. At the moment we can't upgrade to Python >= 3.8 since we have dependencies towards keyczar and pycrypto which are not compatible.
Another of the problems that has been experienced is if the gcc-version used is >= 9 there will be problems building Python3 or odd linking problems. This can in most cases be handled by changing the compiler used. On Ubuntu 21.10 you can switch gcc-version quite easy
%> sudo apt install gcc-8 g++-8
%> update-alternatives --install /usr/bin/gcc gcc /usr/bin/gcc-8 100 --slave /usr/bin/g++ g++ /usr/bin/g++-8 --slave /usr/bin/gcov gcov /usr/bin/gcov-8
and then change version by
%> update-alternatives --config gcc
We run a Git repository internally in the partnership, so it makes sense to use the same service for public releases.
The package that installs the complete BALTRAD node is called the node-installer, and it can be downloaded from the BALTRAD Git repository at https://github.com/baltrad, which is the repository's web interface. You can download a snapshot from the node-installer.git project, in which case you'll download a tarball (.tar.gz file).
You can also grab the latest release from the command line if you have (or download and install) a Git client. In this case, do the following:
$ git clone https://github.com/baltrad/node-installer.git
Doing this will download the node installer in a directory named ./node-installer. You can immediately change to this directory and read the INSTALL file. Don't try to install anything before you have prepared a database, as is described next.
Installation is a one-liner! The command to use is setup.
setup comes with a lot of arguments and options. To list them all, run
$ ./setup --help
This may appear to be a bit of a jungle at first sight, but setup is a systematic, comprehensive, and powerful tool. Let's make sense out of this. A basic installation that will give you a node for exchanging data can be installed with the following command, assuming the node is located at SMHI on a CentOS machine and the passwords have been kept secret:
$ ./setup --tomcatpwd=<> --nodename=se.smhi.balthazar --prefix=/opt/baltrad \
--jdkhome=/usr/java/jdk1.6.0_16 \
--with-psql=/usr/include/pgsql,/usr/lib64/pgsql --dbpwd=<> install
The tomcat password should be set using the –tomcatpwd argument; this will make the tomcat server much more secure. The node name given using the –nodename argument should use a systematic naming convention; we recommend one inspired by Java which is like reverse Internet domain addresses. The other arguments point out the root directory under which all software is to be installed (–prefix), the location of you JDK SDK, where your Postgre installation's headers and libraries are, and your database's password.
Save your use of setup to file. You can even use it as as simple script.
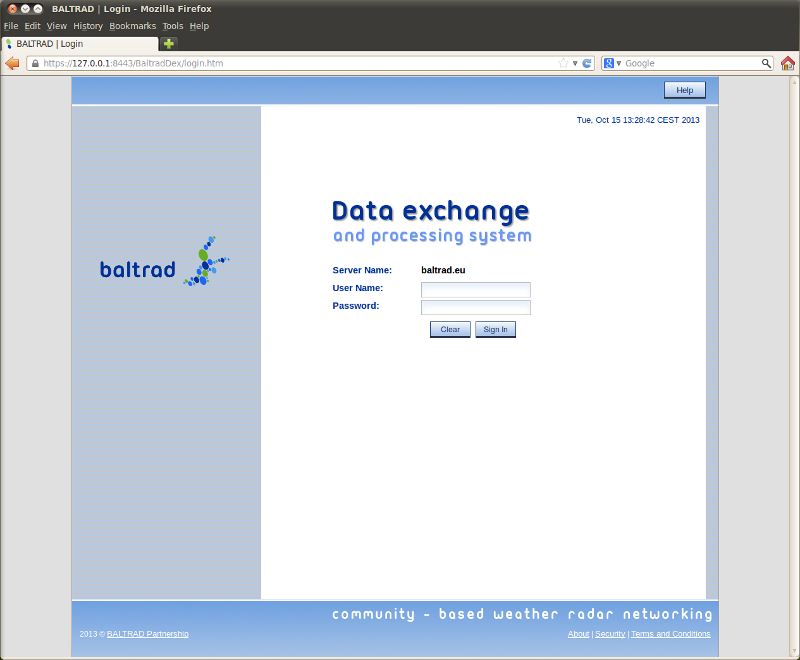
The first time you install the system is going to take some time because there's a lot of software to be built, so just sit back and enjoy the show! When installation is finished and successful, you should see something like this:
===== SUCCESS ======
System has sucessfully been installed and started
You should be able to access the system by navigating a browser to:
http://localhost:8080/BaltradDex


Your BDB sources might not be up-to-date. You can import them from
Rave's radar-db with the following command:

/opt/baltrad/baltrad-db/bin/baltrad-bdb-client \
  import_sources \
  --url=http://localhost:8090 \
  --dry-run \
  /opt/baltrad/rave/config/odim_source.xml

You can omit some changes by adding '--ignore=src' to the command.
Once you are satisified with what the importer will do, omit the
'--dry-run' switch and let it work on the actual database.
Don't mind the part about the BDB for now. We'll get to that in Configuration. Use your web browser with the URI given above. If you see something like this, then you've succeeded!
A slightly more complex installation involves installing the BALTRAD toolbox with several packages containing tools:
$ ./setup --tomcatpwd=<> --nodename=se.smhi.balthazar --prefix=/opt/baltrad \
--jdkhome=/usr/java/jdk1.6.0_16 \
--with-psql=/usr/include/pgsql,/usr/lib64/pgsql --dbpwd=<> \
--with-rave --rave-dex-spoe=localhost:8080 --rave-center-id=82 \
--with-rave-gmap --with-bropo --with-beamb --with-bufr install
Note that we have explicitly specified the BALTRAD node's single point of entry so that RAVE will know where to inject files. This is done with the –rave-dex-spoe argument. We've also set the WMO code for the originating centre using the –rave-center-id argument. It is important that you use your country's center ID number if you're running BALTRAD at a national meteorological service!
If, for some reason, you need to re-install one or more packages, use the –rebuild option and list them before re-running setup. To avoid reinstalling database tables, use the –excludedb argument. To explicitely reinstall them, use the –reinstalldb argument. This will wipe out whatever configuration you had previously. This is more relevant when you are Upgrading to a new node version (see below).
There are lots more arguments and options, for example for specifying the location of the database server, the ports used by the tomcat server and BDB. Please see the setup reference for a systematic tabulation of them all.
This is a short section. setup comes with a couple of commands that you can use to download, but not install, all the packages on to a machine that's exposed to the Internet. That gives you the ability to transfer everything to the protected machine and continue the installation there. There are two options:
-fetch will fetch all packages -dist will create a distribution tarball that you can move wherever you want.The easiest way to upgrade to a new version is to use your Git client to synchronize with the repository at git.baltrad.eu. Just enter the node-installer directory on your machine and
$ git pull
That'll do it. Following this synchronization, just run setup again, like you did the first time. If the release notes don't mention any changes to the database tables, you can safely add the –excludedb option to avoid messing with them.
$ ./setup --tomcatpwd=<> --nodename=se.smhi.balthazar --prefix=/opt/baltrad \
--jdkhome=java-8-openjdk-amd64 \
--with-psql=/usr/include/pgsql,/usr/lib64/pgsql --dbpwd=<> --excludedb \
--with-rave --rave-dex-spoe=localhost:8080 --rave-center-id=82 \
--with-rave-gmap --with-bropo --with-beamb --with-bufr install
You should get the same ===== SUCCESS ====== message again with each upgrade.
Note: this information may be updated in your setup before it is updated here.
NODE INSTALLER
Usage: setup <options> command, use --help for information

This is the main installation script for installing a baltrad node.
Most of the installation is handled without any interaction. However
if you don't want to specify --tomcatpwd on command line you will
get a question about it.

The script will remember several configuration parameters between
runs but some of them will not be stored, like passwords and
similar items. If you want to use the previous parameters, then
you can specify --recall-last-args

Command:
Valid commands are:
 - install
     Installs the software

 - check
     Checks that the provided dependencies are correct

 - clean
     Cleans up everything

 - fetch
     Fetch all packages so that it is possible to run an installation
     in 'offline' mode. It will atempt to clean up any unessecary
     content but it is suggested to execute clean prior fetch.

 - dist
     Create distribution tarball

Options:
--help
    Shows this text

--recall-last-args
    If you want to use the previous arguments, then you can use
    this option. It will try to restore the configuration parameters
    used in the last run.

--nodename=<name>
    This attribute should really be specified but there is a default value which
    is the hostname as shown by the command 'hostname'. The node name is a
    unique identifier that is used for identifying you within the exchange
    network. The node name should usually explain exactly who you are. A good
    example is to use the Java package naming. For example se.myorg or
    se.myorg.test or similar. This node name will also defining what this
    installations key will be named.

--prefix=<prefix>
    Points out where the system should be installed.
    [Default /opt/baltrad]

--tprefix=<prefix>
    Points out where the third-party software should be installed.
    [Default <prefix>/third_party]

--jdkhome=<jdkhome>
    Points out the jdkhome directory. If omitted, the installer will
    try to find a valid jdk.

--keystore=<path>
    Point out the keystore directory to use when configuring setting up the
    different modules for certification. If not specified, one will be
    created for you in <prefix>/etc/bltnode-keystore.

--with-zlib=yes|no|<zlibroot>|<zlibinc>,<zliblib>
    Specifies if zlib should be built by the installer or not.
    [Default yes]
    - 'yes' means that the installer should install the provided zlib
    - 'no' means that the installer should atempt to locate a valid
      zlib installation
    - zlibroot specifies a zlib installation where includes can be
      found in <zlibroot>/include and libraries can be found in
      <zlibroot>/lib
    - <zlibinc>,<zliblib> can be used to point out the specific
      include and library paths

--with-psql=<psqlroot>|<psqlinc>,<psqllib>
    Specifies where to locate the postgresql include and library files.
    If omitted the install script assumes that they can be found in
    the standard locations.
    - psqlroot specifies a postgres installation where includes can be
      found in <psqlroot>/include and libraries can be found in <psqlroot>/lib
    - <psqlinc>,<psqllib> can be used to point out the specific
      include and library paths

--with-freetype=<freetypeinc>,<freetypelib>
    In order to get freetype support built in the Python Imaging Library (PIL,
    for use with Google maps plugin). You might have to specify this
    library. <freetypeinc> is the path to the freetype include directory
    as shown when executing freetype-config --cflags excluding the -I of course.
    <freetypelib> is the path where libfreetype.so can be found.

--dbuser=<user>
    Specifies the database user to use.
    [Default baltrad]

--dbpwd=<pwd>
    Specifies the database user password to use.
    [Default baltrad]

--dbname=<name>
    Specified the database name to use.
    [Default baltrad]

--dbhost=<host>
    Specified the database host to use.
    [Default 127.0.0.1]

--with-hdfjava=<hdf java root>
    Specifies the HDF Java root installation directory.
    If omitted, the installer will install it's own version of hdf-java.

--reinstalldb
    Reinstalls the database tables. Use with care.

--excludedb
    Ignores installation of the database tables. Might be since they
    already has been installed. This will cause the DBINSTALL package
    to be set as installed.

--runas=<user>
    Specifies the runas user for Tomcat and other processes. It is not
    allowed to use a runas user that is root due to security issues.
    [Defaults to user that is installing]

--datadir=<dir>
    The directory where all the data storage files should be placed for
    BALTRAD-db.
    [Default <prefix>/bdb_storage]

--urlrepo=<url>
    The URL from where the dependency packages can be fetched.
    [Default http://git.baltrad.eu/blt_dependencies]

--gitrepo=<url>
    The URL from which the BALTRAD node Git packages can be fetched.
    For example --gitrepo=http://git.baltrad.eu
    [Default git://git.baltrad.eu]

--with-rave
    Install the RAVE PGF

--rave-pgf-port=<port>
    Set the port RAVE should run on.
    [default: 8085]

--rave-log-port=<port>
    Set the port the RAVE logger should run on.
    [default: 8089]

--with-bufr
    Install OPERA BUFR software. This will affect RAVE such that readling of
    polar data in BUFR will be supported.

--rave-center-id=<id>
    WMO originating center ID to be used by RAVE as the source of its products.
    Reference: WMO No. 306.
    [default: 82]

--rave-dex-spoe=<spoe>
    DEX's single point of entry to be used by RAVE.
    [default: localhost:8080]

--with-rave-gmap
    Install the RAVE Google map plugin. Will also cause RAVE PGF to be
    installed.

--with-bropo
    Install bRopo anomaly detectors. Will also cause RAVE to be installed.

--with-beamb
    Install beam blockage detector package. Will also cause RAVE to be
    installed.

--with-bwrwp
    Installs the BALTRAD weather radar wind profile generator. Will also cause
    RAVE to be installed. This is a very special product generator that
    requires a Fortran compiler to built its dependencies, e.g. gfortran.
    This product requires that the following options also are specified:
    --with-blas=, --with-cblas=, --with-lapack= and --with-lapacke=.
    See below on how to use these options.

--with-blas=<libblas.a directory>
    Specifies the directory where the libblas.a library resides. Currently only
    used when installing bwrwp.
    NOTE that the library objects must have been compiled with -fPIC or similar
    for shared object capabilities since it will be linked into a shared
    library.

--with-cblas=<root> or <cblas.h incdir>,<libcblas.a dir>
    Specifies where the cblas.h include directory and the libcblas.a directory
    resides. You can also specify CBLAS root directory that should contain the
    include and lib directory. Currently only used when installing bwrwp.
    NOTE that the library objects must have been compiled with -fPIC or similar
    for shared object capabilities since it will be linked into a shared
    library.

--with-lapack=<liblapack.a directory>
    Specifies the directory where the liblapack.a library resides. Currently
    only used when installing bwrwp. NOTE that the library objects must have
    been compiled with -fPIC or similar for shared object capabilities since it
    will be linked into a shared library.

--with-lapacke=<lapacke.h incdir>,<liblapacke.a dir>
    Specifies where the cblas.h include directory and the libcblas.a directory
    resides. Currently only used when installing bwrwp.
    NOTE that the library objects must have been compiled with -fPIC or similar
    for shared object capabilities since it will be linked into a shared
    library.

--bdb-port=8090
    BDB server port

--bdb-uri=<uri>
    The BDB URI, as default this has no use even when specified. It will only
    be used if subsystems have been specified so that you can specify a
    different BDB server. Also, if this is specified, bdb-port will not have
    any meaning.
    E.g. --bdb-uri=http://somehost:8090
    [Default: Not used]

--bdb-pool-max-size=<N>
    Set the pool size for BDB connections to <N>
    [default: 10]

--bdb-auth=<authtype>
    BDB authentication model. Valid values are:
      * 'noauth' - perform no authentication
      * 'keyczar' - authenticate using Keyczar, reusing host keys
    [default: keyczar]

--bdb-storage=<storagetype>
    BDB storage model. Valid values are:
      * db - store files in the database with a cache in
      * fs - store files in
    [default: db]

--rebuild=<module1>,<module2>,...
    Will force a rebuild and installation of the specified modules. To get a
    list of available modules and their versions. See option --print-modules.
    E.g. --rebuild=TOMCAT,RAVE

--print-modules
    Prints all available modules and their respective version.

--print-config
    Prints the build configuration

--exclude-tomcat
    Will exclude installation of Tomcat. This is not a recommended procedure
    but it is here for the possibility to use your own Tomcat installation if
    necessary.

--tomcatport=<port>
    Specifies the port on which the Tomcat installation should listen.
    Don't use together with --tomcaturl.
    [Default 8080]

--keystoredn=<dn>
    The distinguished name used in the keystore cert for the secure
    communication. If <dn> is yes, then a number of questions will be asked
    during the creation of the keystore. If <dn> is no, then a predefined DN
    will be created with the format
      "CN=Unknown,OU=Unknown,O=Unknown,L=Unknown,ST=Unknown,C=Unknown"
    Or you can specify your own DN, just keep the above format. Note, that you
    cannot specify a DN with any spaces in it. If you have that format you will
    have to use 'yes' instead to get the questions.
    [Default yes]

--keystorepwd=<pwd>
    Specifies the password that should be used for the key. If this has not been
    defined, the tomcatpwd will be used.

--tomcatsecureport=<port>
    Specifies the port on which the Tomcat installation should listen on for
    secure messages.
    [Default 8443]

--tomcaturl=<url>
    Specifies the URL where the Tomcat installation resides. Don't use together
    with --tomcatport.
    [Default http://localhost:8080]

--tomcatpwd=<pwd>
    Specifies the password that should be used for the manager in the tomcat
    installation.

--tomcatfwdports=<httpport>,<httpsport>
    Specifies that port forwarding has to be supported by the node and hence a secondary mapping
    is added to the dex applicationContext. This attribute is typically used when having the tomcat
    server behind a firewall and proxying calls through a webserver like apache.

--force
    Unused at the moment

--experimental
    When running into problems with building, like missing libraries, link
    problems or other miscellaneous problems, this might be the option to
    specify to get through the build. Some modules are currently being
    evaluated for stability in a production environment, and by specifying this
    option, these modules will be built instead.

--subsystems=(STANDALONE_RAVE, RAVE ,BDB ,DEX)
    If you are interested in running a standalone installation of RAVE, BDB or
    DEX, it is possible to do so by specifying which subsystems that should be
    installed. Since RAVE depends on the BALTRAD-DB Python client API, you are
    able to specify a specific RAVE module called STANDALONE_RAVE which installs
    RAVE without any BDB-dependencies.
 1.9.1 for