 |
Frequently Asked Questions and User Guide
|
|
Frequently Asked Questions and User Guide
|
Congratulations! If you've come this far, it means you've succesfully followed the instructions in Installation and you have a node that is up and running. Your next responsibility is to configure it both for increased safety and to get it working. This involves a bit of manual labour, given in the following sections.
This is the first thing you should do. Your node comes with a pre-configured user called admin, and this user's password is 'baltrad'. You have to log on using the web-based user interface and change it to something only you know.
From the main menu placed in the left column, click "User accounts" --> "Edit user" link (located in the "Settings" section). There you'll see the admin user and a link to the right called "Change" under the heading "Password". Use a safe password, and store it in a safe place that you remember.
Click "Node settings" from the left-column menu. This is where you should identify your node properly. If you didn't build your node with –nodename, then your default node name will be your computer's hostname. Your node should be type "Primary".
The "node address" is very important. If the URI contains "localhost" or 127.0.0.1, then it is vital that you change this to the IP number or network name that external computers can use to communicate with it. Failing to do this will cause data exchange errors.
The pure text fields accept non-ASCII characters like å, æ, and ø. Add the correct details of your organization. There's no reason to change the work directory. The e-mail address is not used currently, but you should enter a valid one anyway.
The node comes with a set of European weather radar identifiers. These are found in an XML file in the RAVE package, so you should have installed or at least downloaded RAVE. If you are interested in adding more radars to this file, you are welcome to do so and submit them to us!
Your database must be configured with this information, and the procedure is manual. On the command-line, taking care that your paths and the URI to your database are correct, run:
/opt/baltrad/baltrad-db/bin/baltrad-bdb-client \
  import_sources \
  --url=http://localhost:8090 \
  /opt/baltrad/rave/config/odim_source.xml
This will take a few seconds, and it won't tell you anything if all goes well.
You only need to do this with your own radars. It might be relevant for radars operated by other organizations too if you plan on forwarding their data to other nodes, but we will only deal with your data here for the sake of simplicity.
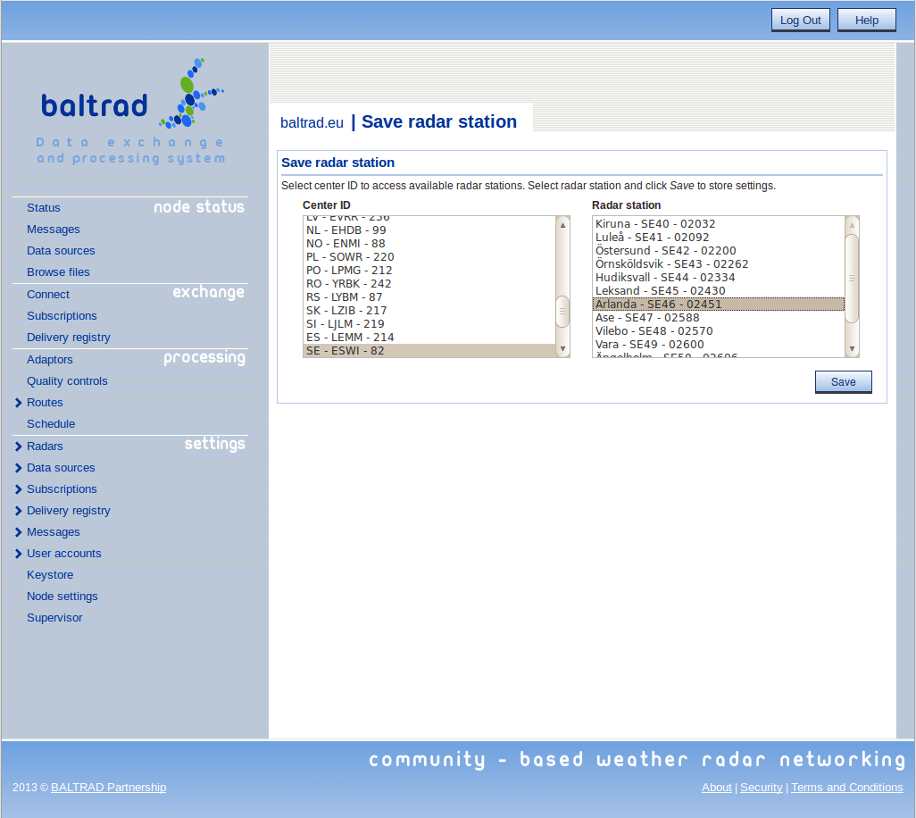
Select "Radars" from the main menu and "Add" to define a new radar. The selection of radars is predefined based on the set of European weather radar identifiers, also used in RAVE package. These identifiers are found in an XML file being a copy of a file used by RAVE. Click on the center identifier in the left column to expand the list of radar stations available for the selected center. Select a desired radar and click the "Save" button. Radar station will be saved in local database.
We use "data sources" in BALTRAD for identifying data that are available for exchange. You associate a data source with different types of data, e.g. a polar scan or volume, and then you can expose them selectively to other nodes via their peer users that connect to your node. We'll deal with the peer users later.
In order to define a data source, select "Data sources" --> "Add" from the "Settings" section of the main menu. The example uses Polish radar located in Legionowo, as shown in the image below.
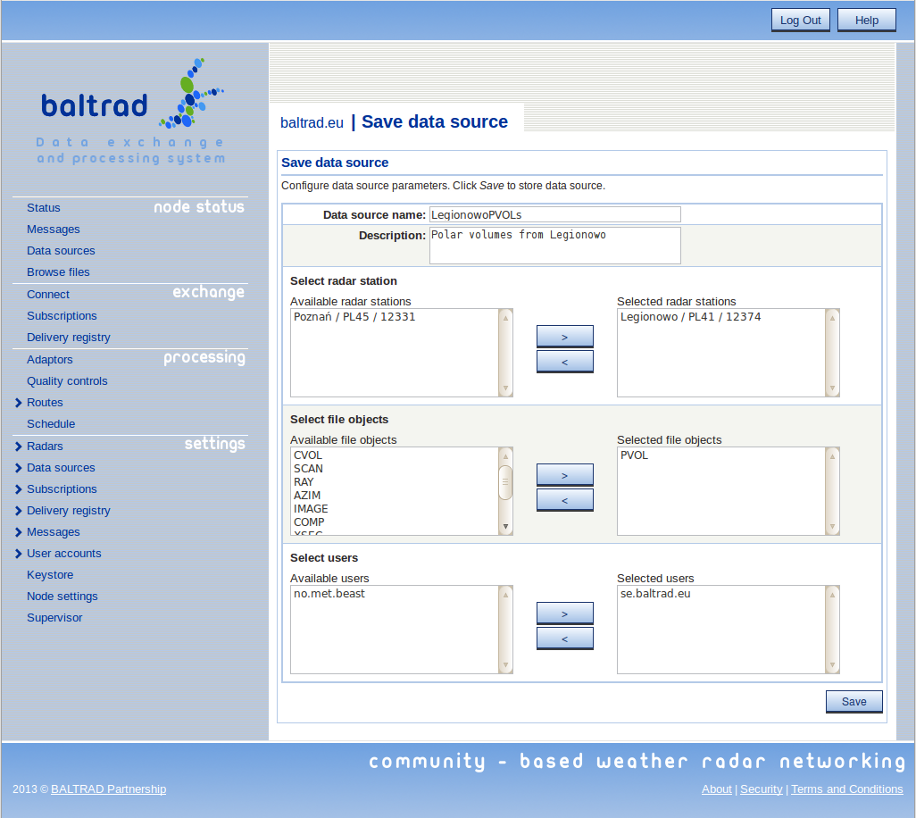
Start by adding a source name and description. Then continue by associating selected radar with it. To achieve this, select desired radar from the "Available radar stations" and click the ">" button to add the radar. Selected radar will be moved to "Selected radar stations" list. In order to remove radar from selection, use the button marked with "<" sign. The same approach is applied to the selection of the remaining data source parameters.
Next specify what type of data from this radar are relevant for exchange. If your radar sends you data one scan at a time, then select "SCAN". If the radar sends a complete polar volume all at once, then select "PVOL". Don't worry about the other menu items for now. Then you link users to this data source. Note that only peer users can be linked with a data source (it is not possible to assign local users like "admin" or "operator" to a data source). Finally, click "Save" to store the data source.
Editing data sources is done with the same procedure. To edit an existing data source, select "Data sources" and "Edit" from the main menu.
You can combine several radars into one data source. Likewise, you can combine several types of data in a single data source. A warning, however, that it's unwise to combine polar scans and polar volumes in the same data source. Normally, you will be required to create a process where polar volumes are created with data from radars that send you data scan by scan. If another node is subscribing to both types of polar data from the same data source, then it means they'll receive the same data twice.
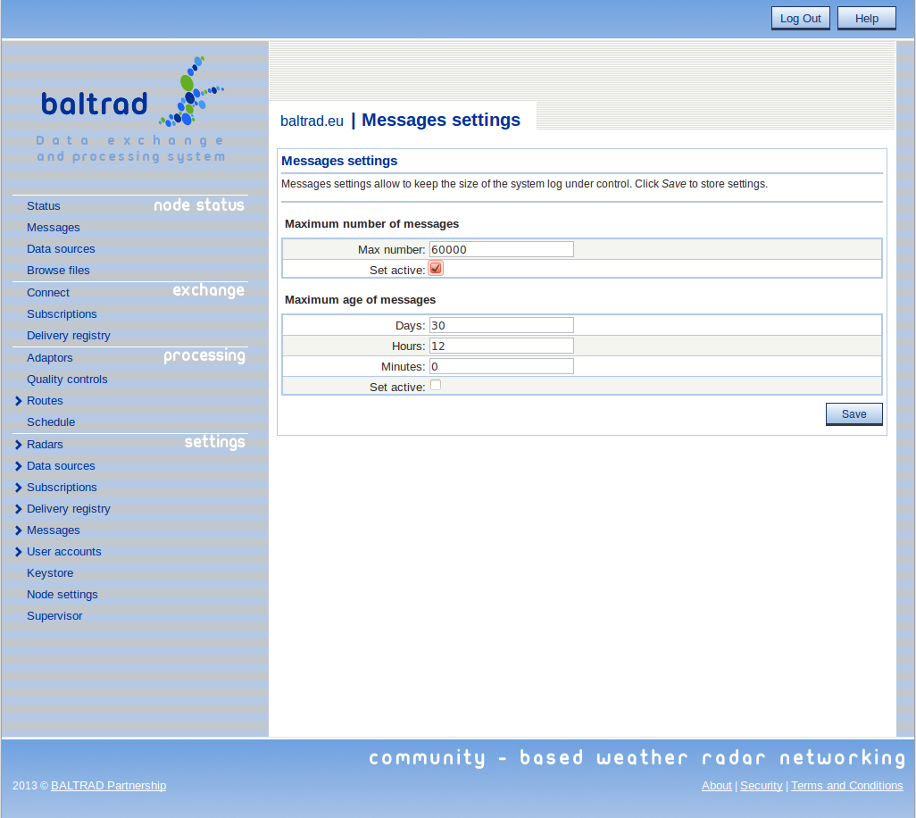
You should configure your system log so that it doesn't overflow with messages. This is done by selecting "Messages" --> "Configure" from the "Settings" section of the main menu.
You should configure your delivery registry so that it doesn't overflow with messages. This registry contains all information on successful and failed data transfers. Configuring the registry's size is done by selecting "Delivery registry" --> "Configure" from the "Settings" section of the main menu.

In a later chapter, we'll get into how two nodes can exchange data through subscriptions, but you have to get your own data into your node first. We offer you a "back door" whereby data are added using a secure injection mechanism.
But before you inject your data, they must be converted to the ODIM_H5 file format. There are several good converters available from within the community and from manufacturers. Ask around if anyone has already succeeded in converting from the format that your radar uses; chances are good that someone has something you can use.
We will assume that you are going to inject data from the same machine, in other words data are on the same machine as the BALTRAD node that will receive them. We offer you two injectors for this:
$ odim_injector --helpto see what options you have.
odim_injector is based on the file based inotify which means that it will react each time a file is placed in a specific directory. This means that each time a file is placed in the specified directory, an atempt will be made to inject the file into the dex node by using the rave baltrad injector.
Both injectors work from remote computers, ie. not the same machine as the one running your BALTRAD node. If this is how you want to do it, then you have to ensure that the injector you choose is propery configured when it comes to communication security, which is covered in Security in BALTRAD.
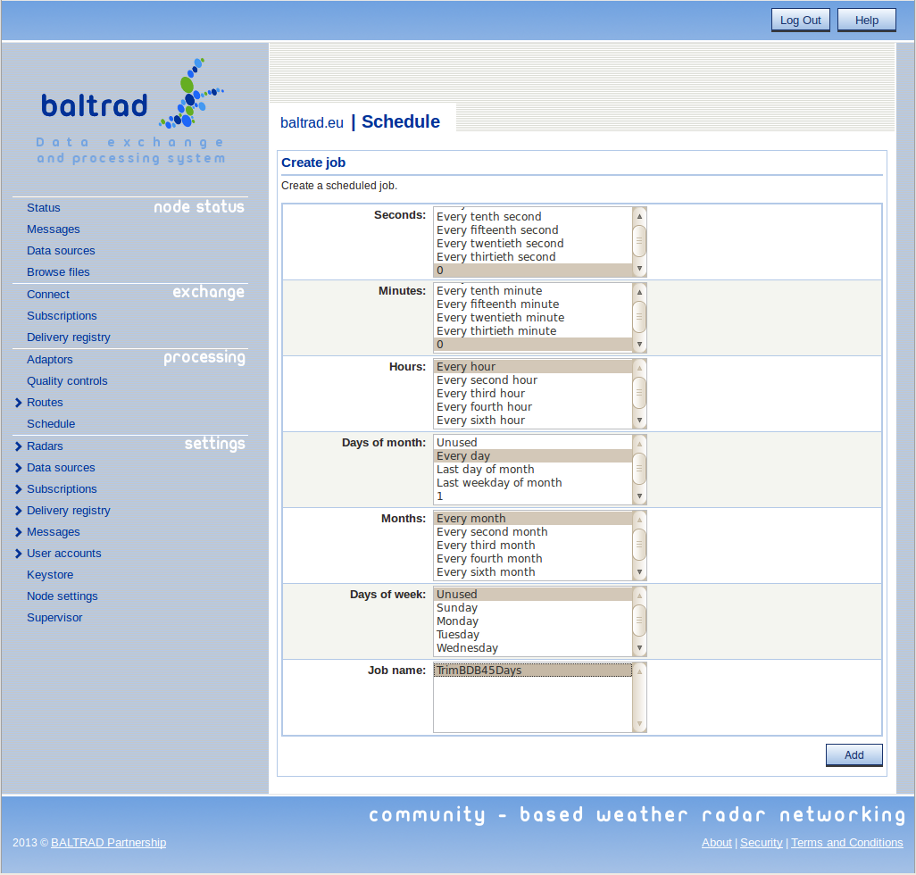
A classic problem that causes systems to stop working is that the computer's disks become full. In BALTRAD, its your database (BDB subsystem) that stores your data. It's very easy to configure it to a comfortable size that suits your needs. This is done by creating a new route in "Processing" section of the main menu. Select "Routes" --> "Create DB trim age", e.g.
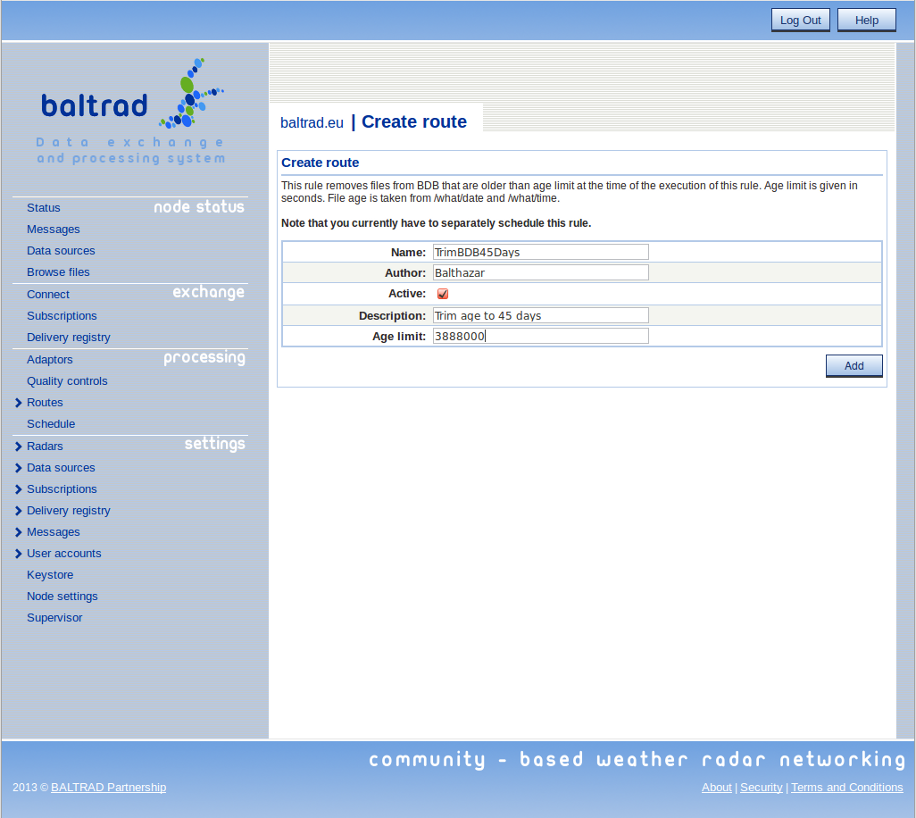
Note that when the route has been defined, it must also be scheduled. You don't need to do this scheduling for normal data processing tasks, just the "Create DB trim age" and "Create DB trim count" routes.
 1.9.1 for